If your goal is to have users interact with your Facebook page, you want them to like, share or comment on your posts. This keeps your Facebook page alive and drives more interactions, resulting in more engagement with your audience and ultimately, in better awareness of your products or services.
Sometimes though, you don’t want to stop there, but direct the users from Facebook to your website or mobile app, and even make them do something there, for example, buy a product from your e-shop.
You might ask: How can I effectively show my ads to users, who are most likely to make this desired action outside of Facebook? Conversion campaigns are the answer to this question.
Before You Start
In short: You need to have Facebook posts with links that lead to a website or app with properly implemented Facebook Pixel or App events tracking.
Suitable Content on Your Facebook Page
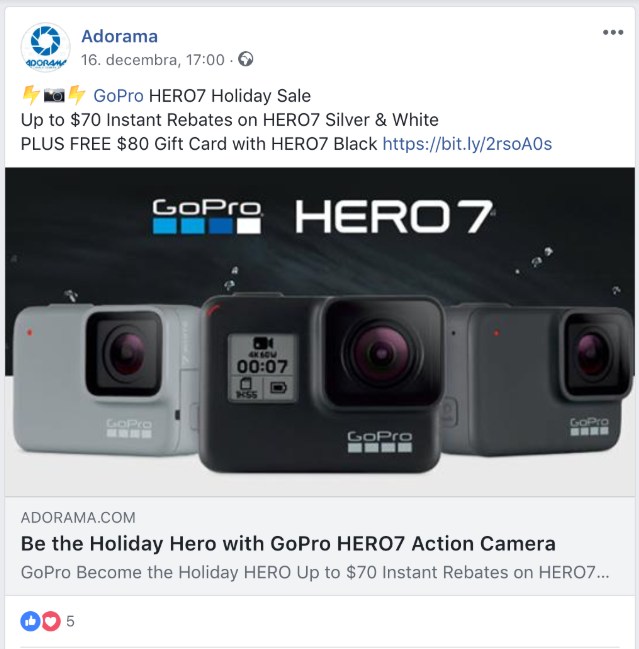
You need to publish regular posts with links. These can be link posts, or for example photo posts with links in the text. The links have to lead to your website (for example, an e-shop) or your mobile app.
Conversion being the last step in the marketing funnel, the content of the post and also the link target should be specifically chosen to be compatible with this goal. For example, if you have an e-shop and you want to optimize for a conversion event “add a product to the shopping cart”:
The content of the post shouldn’t be chosen to drive likes on Facebook, but inform the user that he can buy the desired product right after he clicks on the link. Similarly, the link should lead directly to a product or to a product category, from where the user can very easily click on a suitable call to action button (“add to cart”); and not to your blog from where the user needs multiple clicks to find the “add to cart” button.
A Correctly Implemented Facebook Pixel or Facebook App Events Code
For Facebook to track what is going on outside of Facebook, it needs a special bit of code on your website or mobile app. The usual way for websites is to use the so-called Facebook pixel, which is a simple script that every website administrator should be able to implement without any issues. Facebook pixel basics description can be found here https://www.facebook.com/business/learn/facebook-ads-pixel and you can also read the official pixel integration tutorial here https://www.facebook.com/business/help/952192354843755
You can use the conversion events that are pre-defined by Facebook, or, with the help of a programmer or digital media specialist, make your own custom conversion events that correspond to the exact action you want to optimize for.
There is also a multitude of plugins for various popular CMS systems (for WordPress Woocommerce for example, you can use the official Facebook plugin).
A more advanced way of tracking and optimizing for your goals is to use Facebook App Events. App Events are the actions people take while using your app. This feature usually requires more technical skill than using a Facebook pixel, however, it uniquely enables you to track and optimize for actions your customers do even within iPhone or Android mobile apps.
You can read more about App Events tracking options here https://www.facebook.com/business/m/one-sheeters/app-events-overview
Boosterberg Conversion Campaign Setup
In short: You should use the “Conversions” campaign goal, along with the ad set optimized for your desired conversion event.
You can identify posts that are intended for your conversion campaign by using post types filters, keyword conditions, or the link click performance start condition, which closely correlates with good conversion performance.
The boosted posts can then be stopped based on the number of conversions (if you want to stop them after reaching your goals) or based on their Cost per Conversion performance.
Campaign and Ad Set Settings
When creating a new Conversion campaign, you follow the same steps as with every other campaign, with a few modifications:
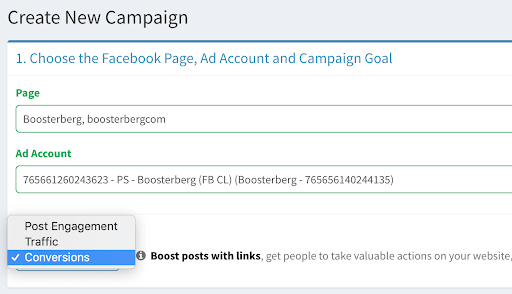
In the first step, you switch from the default “Post engagement” Goal to “Conversions”. Boosterberg will check if you have a Facebook pixel available in your ad account (this does not automatically mean that the pixel is correctly implemented, just that it exists).
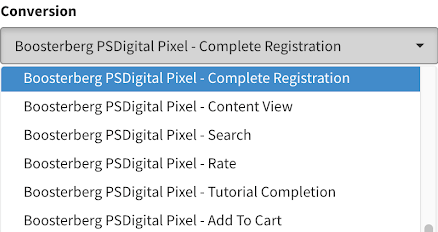
In the ad set settings/budget tab, you have to choose the desired conversion event from the list. This is the event that your ads will be optimized for. If you don’t see the desired event on the list, you need to refer to your Facebook pixel settings.
In the placement tab, just leave the “automatic placement” in place if your goal is a conversion event in a mobile app or a mobile device-friendly website. If your goal is a conversion on a website that is not ready for mobile devices, change the “Device type” option from “All devices” to just “Desktop”.
[su_spacer size=”10″]
Boosting condition settings
Seeing as conversions are not tracked on organic Facebook posts, for now, Boosterberg doesn’t have the ability to start boosting based on organic conversion performance. In the future, we plan to enable this feature by implementing Google Analytics integration and, of course, tracking other running ads and extending their duration with more budget.
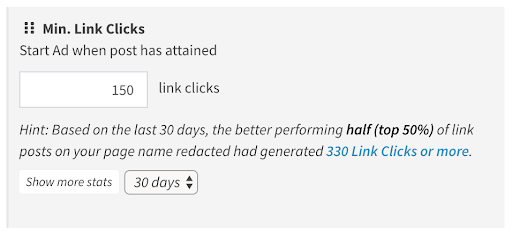
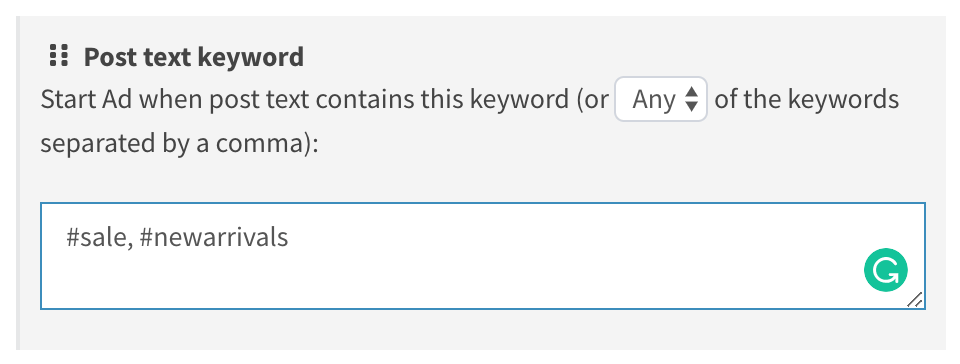
Conversion campaign posts can be boosted based on post type (Link, Photo etc), keyword (text or URL) conditions that help identify posts created for converting your customers, or the next best thing after conversions – the “number of Link Clicks” start condition. Link click performance is not the same as Conversion performance, but according to our experience, these metrics correlate closely – when the first one is high, you can reasonably expect the other one to be high as well. Until we have better means of identifying organic content with the highest conversion potential, we recommend using link clicks performance as a substitute.
In the stop condition section, you now have the ability to stop ads based on their conversion performance.
You can use the “Number of Conversions” condition to stop any ads that reach this amount of event instances. This is very useful especially if you have a defined limit after which the ad is no longer relevant – for example, when you have a limited product inventory, you can set up this condition to automatically stop the ad after your inventory is exhausted.

The second option is the “Cost per Conversion” stop condition. Here, you can choose the average cost per conversion threshold. If the ad has an average cost per conversion below this threshold, it can continue running. If the actual average cost is higher or if the ad did not generate any conversion, it will be stopped. You can also specify the time frame during which this average Cost is calculated, to better accommodate various conversion frequencies.

In Summary
Facebook Conversion Campaigns are a very powerful tool which enables you to target users based not only the usual audience targeting options, but also on their likelihood to do a specific action. This is enabled by Facebook pixel or App Events tracking, which are basically simple scripts that need to be included in your website or mobile app.
With a bit of creativity (and a lot of help from Boosterberg), you can set up conversion campaigns that will automatically boost your conversion Facebook posts and run with constantly being optimized. In this way, you can have great results for your budget with your time being spent mostly with coming up with creative content and not with tedious campaign management.

One Comment
Prachi Singh
I want to prmote my facebook page yoga studio free
Comments are closed.