Boosterberg allows you to create fully automated boosting campaigns for Facebook and Instagram with flexible control over targeting, budget, placements, and performance conditions. This guide walks you through each step of the campaign creation process, from platform selection to launching Smart Boosting.
Feature Overview
The campaign creation process consists of several customizable sections:
Platform Selection – Choose between Facebook, Instagram, or Instagram Stories
Campaign Setup – Define campaign goals, content source and ad account
Budget & Targeting – Set daily or lifetime budgets, scheduling, optimization, ad placement and choose specific audience
Automation Settings – Boost specific post types based on performance conditions
Starting a New Campaign
To create a new campaign:
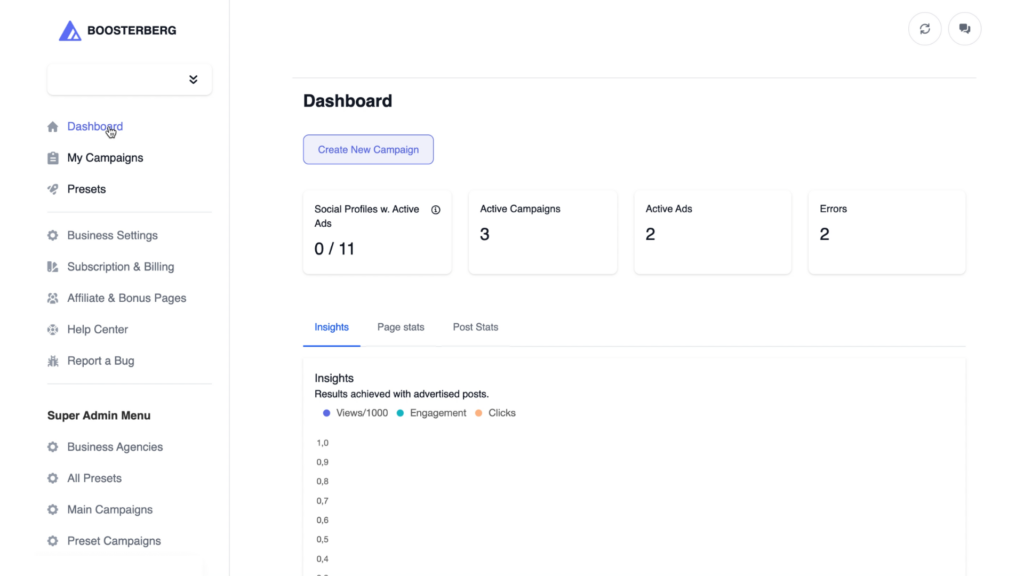
• Go to the Dashboard or My Campaigns section
• Click Create New Campaign
A pop-up window will appear where you can choose the campaign platform:
• Facebook
• Instagram
• Instagram Stories
After selecting a platform, you’ll be taken to the Campaign Creation Page.
Campaign Settings
Start by setting up the core details:
• Select the Content Source and Ad Account
• Choose your Campaign Goal
• Set a Campaign Budget (Optional)
• If applicable, define a Special Ad Category
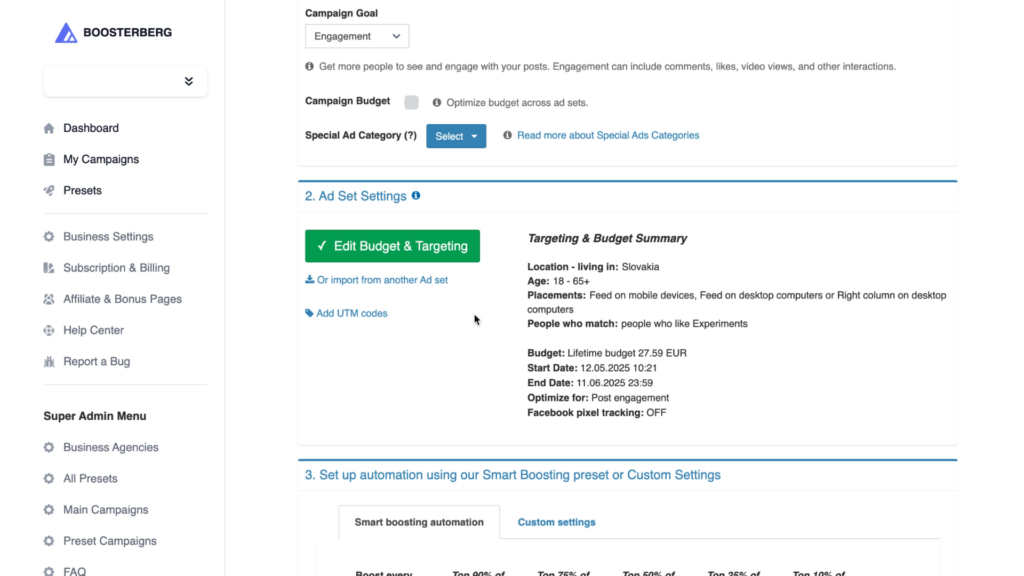
After this step, the Ad Set Settings section will load automatically.
Ad Set Settings
You have two options when configuring ad sets:
• Create a New Ad Set – Customize targeting, budget, and placements
• Import an Existing Ad Set – Select from your Ads Manager or paste the Ad Set ID
📌 Below these options, you’ll also find the ability toAdd UTM codesto your ad set. This helps track traffic sources and performance in external analytics tools like Google Analytics.
Click the “Edit Budget & Targeting” to create a new ad set.
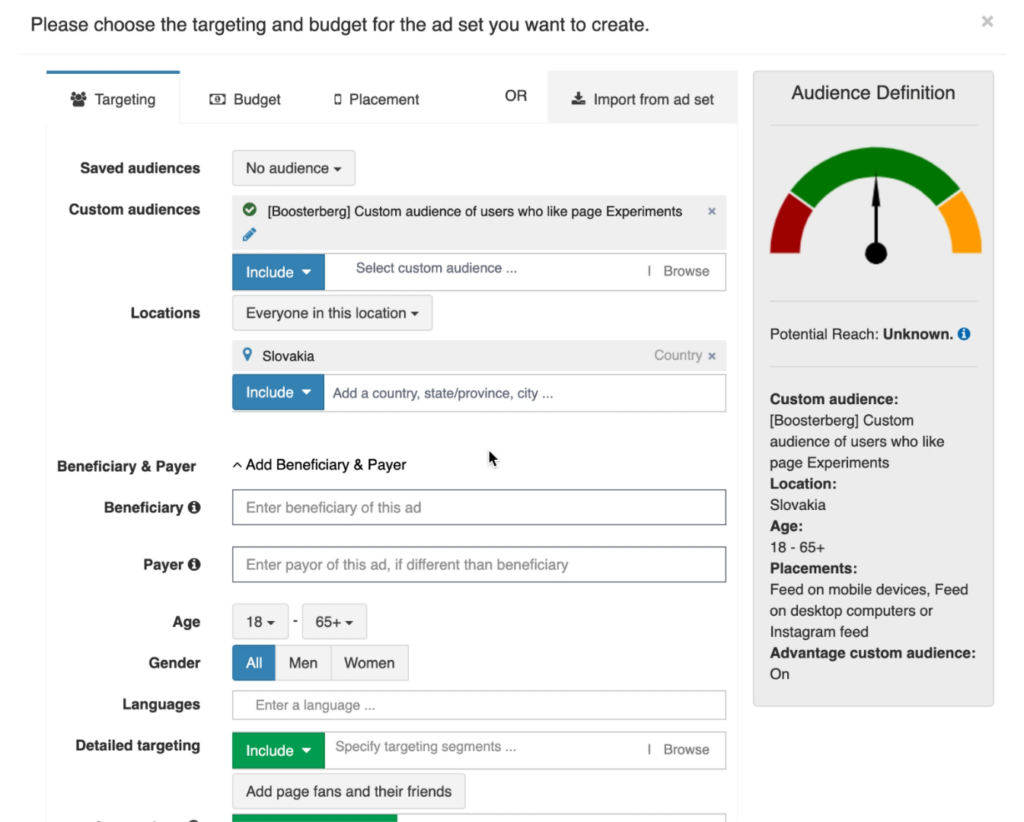
Define Who Sees Your Ads
Set who will see your ads by adjusting:
• Audience
• Location
• Age, Gender, and Language
• Targeting Segments
📌 If you’re targeting European countries or Worldwide, you must specify the Ad Beneficiary.
Click the “Edit Budget” to set the budget of your campaign.
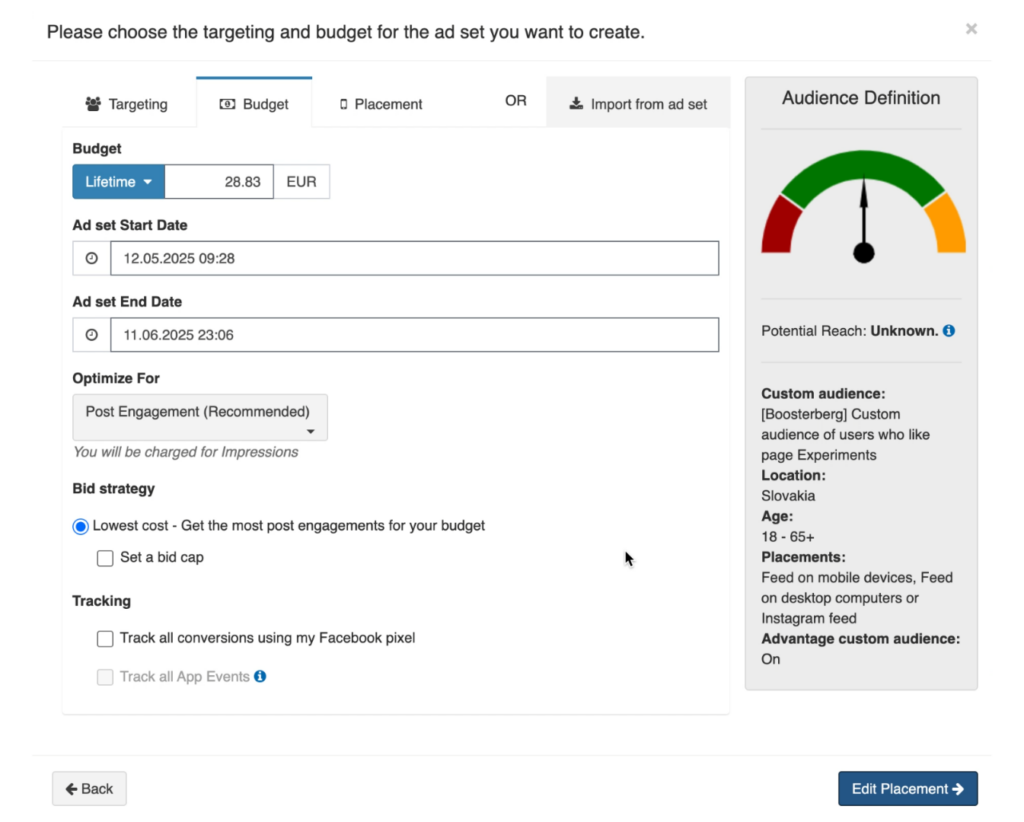
Set Your Budget and Ad Timing
In this section, you’ll be able to configure how much you want to spend and when your ads should run:
• Choose between a Daily Budget or Lifetime Budget
• Set your Start and End Dates for the ad set
• Define your Optimization Goal to guide delivery
• Add Tracking parameters (if needed)
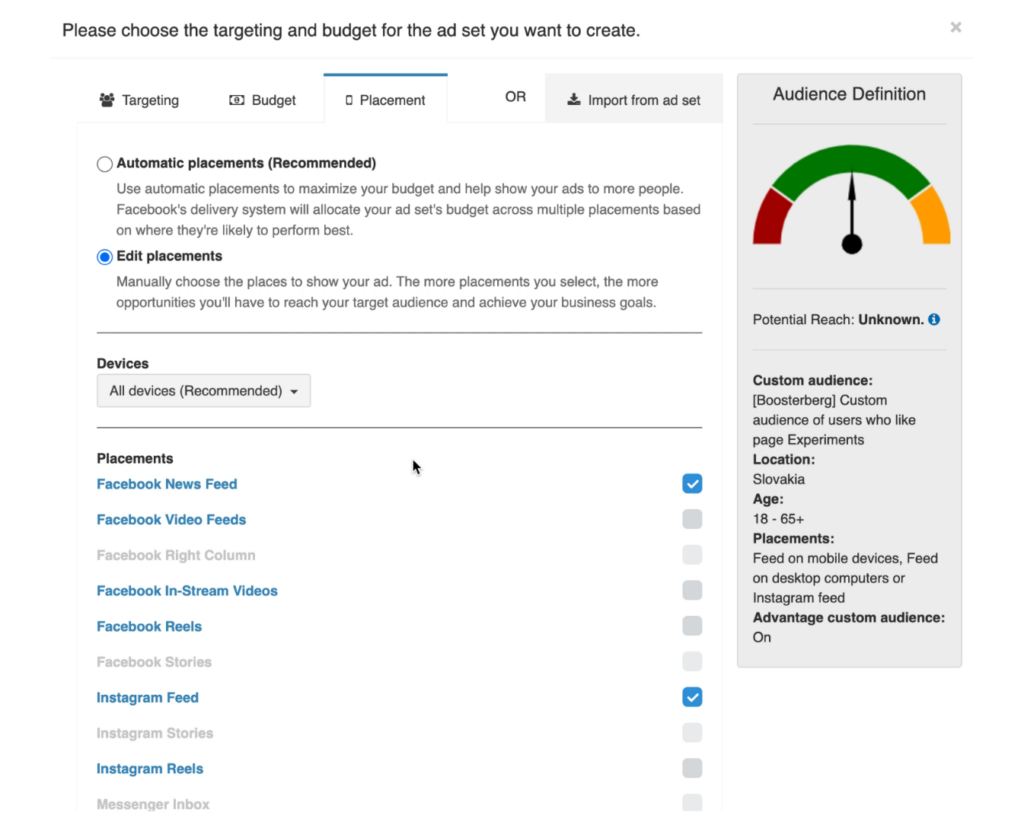
Click “Edit Placement” to manage where your ads will appear.
Choose Where Your Ads Will Appear
Here you’ll decide where your ads should be shown:
• Automatic Placement(Recommended) – Facebook will automatically find the best-performing placements for your ads
• Manual Placement – Manually select the platforms and placements you want to use
As you adjust your settings, the Audience Definition panel on the right will show your potential reach and a summary of your ad set.
Click “Smart Boosting Settings” to move to the final step.
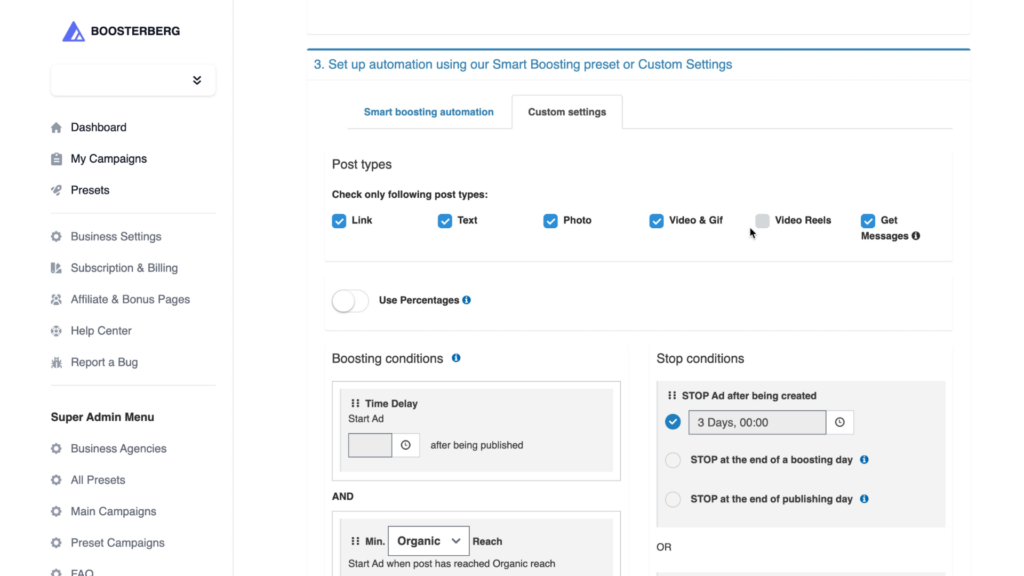
Automate Your Campaign with Smart Boosting
In this step, you set how Boosterberg will automate the promotion of your posts:
• Choose a Smart Boosting Preset or create Custom Conditions
• Define the Post Types to boost
• Set your Boosting Conditions and Stop Conditions(based on the campaign goal)
• Adjust the Past Post Checking number to control how many recent posts Boosterberg reviews for boosting
At the bottom, you’ll see a Boosting Summary showing a complete overview of your conditions and settings. If everything looks good- click “Submit” to launch your campaign.